Friday, December 12, 2008
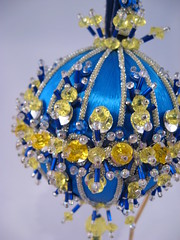
Reflections ornament
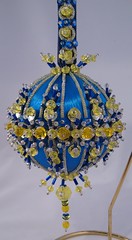
As I settle into my new craft room, I'm taking on the UFOs. I bought this kit about 10 years ago from Cracker Box. If you subscribe to "more is more," then these kits are for you!
I worked on this for a few hours at a time over about 4 days. My fingers got really sore by the end! I'd tried using a thimble, but it was just too big to get down into the spaces between the beads. I know now why they recommend a tool which is used for countersinking nails!
I did need to modify the instructions a bit. See the circular section of the silver braid, most evident on the hanger? In the instructions, it was an oval, so there were fewer wedges of bead designs on the sample. I guess the tension on the braid machine was extra tight on the day mine was made! At any rate, the increased number of wedges left me short on a few styles of beads, so I modified and simplified every other wedge.
I think the end result is still pretty fantastic!
Monday, December 1, 2008
Quickie Ikea Hack

My daughter has been wanting a clock in her room, more for decoration than for telling time. I've never been able to find something that matched her decor (aqua and lime) without it being emblazoned with characters.
Ikea to the rescue! I purchased the Rusch clock in white, bargain basement price of $3. I pried off the clear dome over the clock face and went to work. First, I colored the white plastic frame with Ranger Alcohol Inks. Then I went to work on the face itself. The hands of the clock lift right off, allowing you to pull up the paper face. I simply covered the numbered paper face with glue stick and slapped it onto a piece of scrapbook paper. When that was dry, I cut out the circle, using an eyelet tool for the center circle. The numbers were cut with the George cartridge on the Cricut. I put the clock face on a window so that I could use it as a light box to line up the numbers--even with the scrapbook paper over the paper face, the numbers showed through really well. The numbers were just glue sticked into place.
I went over the red second hand with black StazOn ink. I guess if I wanted to really get into it, I could've spray painted it, but I wasn't that committed. I did add a nice rhinestone to the center, though. I put everything back together and noticed something I didn't like. There's a channel all around the clock frame where the alcohol ink didn't go. I decided to make it part of the overall look by filling the groove with Glossy Accents by Ranger, and then pouring on the holeless microbeads in a lime color. It does take a while to dry, but I think the effect is worth it!
Subscribe to:
Posts (Atom)

